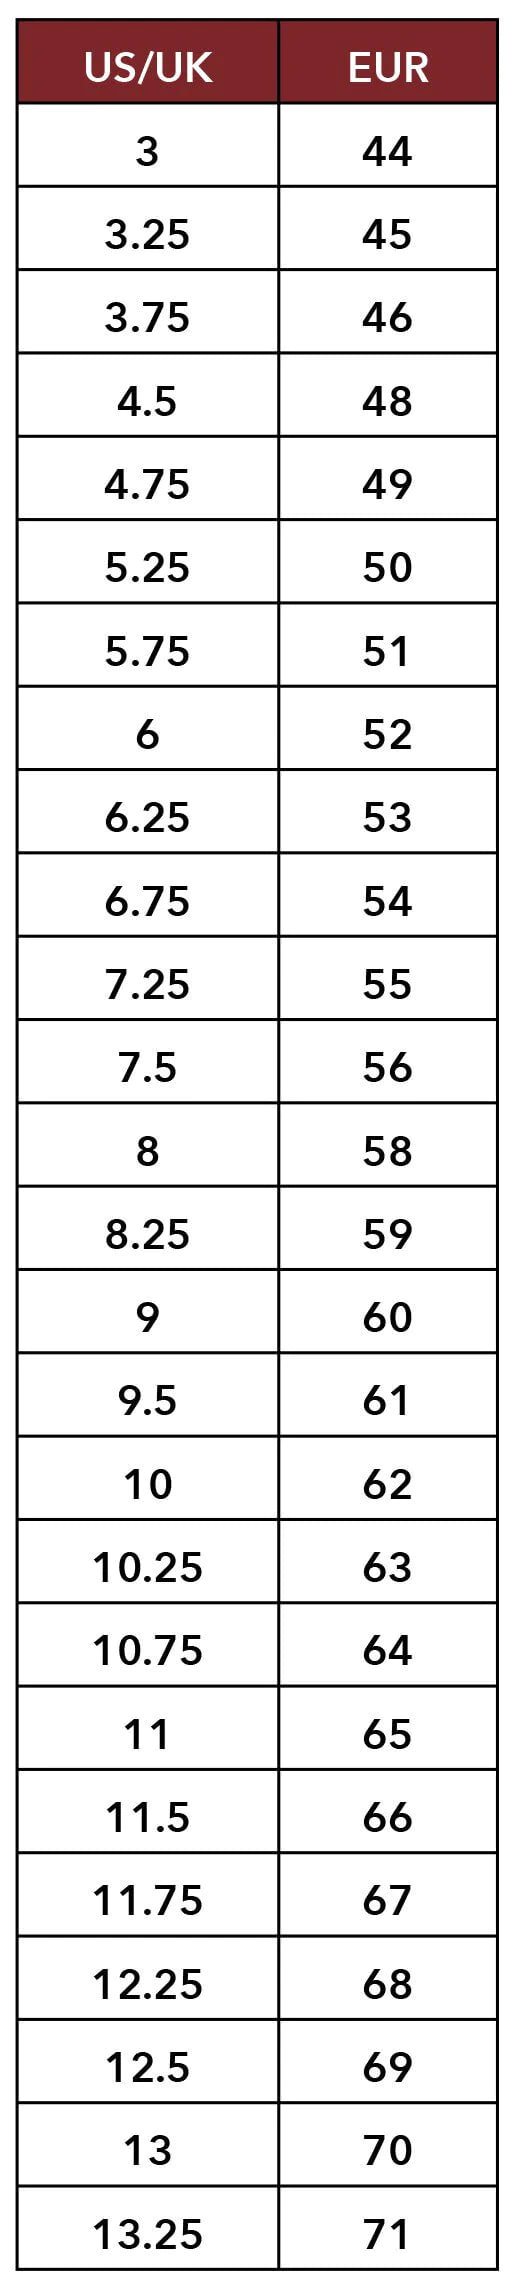
This site has limited support for your browser. We recommend switching to Edge, Chrome, Safari, or Firefox.
Congratulations! Your order qualifies for free shipping Order now for complimentary shipping and returns on all orders.

ITEMS YOU WILL NEED

  • - SCISSORS
  • - RULER
  • - PRINTER
  • - STRING OR PIECE OF PAPER
  • - EXISTING RING (Optional)

BEFORE YOU GET STARTED

Print this guide out via the Download PDF button and set the page scaling option to “None” in the Printer Dialog Box. This guide must be printed on an 8.5” x 11” paper. To ensure accuracy, please use a ruler to measure the sample measurement. It should measure exactly 2 centimeters.

It is recommended to measure your finger when at their largest, typically in the evening. Please make sure your finger is dry.

Sizing can differ between a wide and narrow shank. Thicker bands will fit more snug. Your fingers on the dominant hand are typically larger.

Download Pdf

MEASURE YOUR RING SIZE

Option 1:

  • Wrap the string or piece of paper tightly around the widest part of the finger you want to measure.
  • Mark where the end meets.
  • Measure the length with the ruler and compare to the sizing chart on the right.

Option 2:

  • If you already have a ring that fits the intended finger, place the ring over the circles to the right.
  • Match the inside edge (diameter) of your ring to the circle nearest in size. If the ring falls between two sizes, size up.
ring-sizing-table

Use coupon code WELCOME10 for 10% off your first order.

Cart

No more products available for purchase